Showing posts with label Our Frugal Home. Show all posts

Sunday, March 30, 2014

Birthday Gifts

This years birthday was different than the rest. 
Since Miss Molly decided to give birth to her adorable little babes on my actual birthday, we decided to post-pone the festivities for a week. No big deal. It was easy to reschedule as all we were planning was dinner at a local restaurant and then back to our place for cake and puppy viewings. 
This year, when asked what I wanted as gifts I seriously had no ideas to give people. 
There wasn't anything specific that I wanted. 
J had let me order some lovely bracelets online for a gift. 
My sister pre-ordered me a book she knew I would love. 
My other sister gave me some great bath products from Lush. 
And my other sister said she was going to treat me to a pedicure when the weather is nicer so we could spend some time together. 
And I asked my parents to give me some cash (like I do every year!) 

I decided to use my birthday money for some art work for the living room. 
We have lived in this apartment for almost 3 years and I have never found anything I liked for above our couch. 
It was really starting to get to me. 
Every time I walked into the living room it was like a giant canvas waiting for something to be placed on it. 
I went to a local store, Homesense to wonder one day and say this awesome art combination that I could not take my eyes off. It was 5 photos in one. They are all similar but not the same, which I loved and as luck would have it, in my purse I had my couch fabric swatches and they matched. 
It was only $10 more than my birthday money, but for how much I loved it I had to have it. 

The end result; 
I love it. 
It looks amazing and was affordable (even before using my birthday money). 
My eyes are always drawn to it when I walk in the room. 

Happy Birthday to Me!!
:)

Monday, March 3, 2014

Revamped Spare Room Guest Bed


Our spare room has been a challenge since we moved in almost 3 years ago. 
It has been a struggle to;
a) Find appropriate Storage & Organization
b)  Create a Guest Space while having a play area for my niece and nephews
c) Re-do the room for an affordable price 

While spring cleaning we've been sorting, organizing, and donating items in that spare room. We recently took 2 car trips worth of donations to goodwill. It both felt good and helped in the de-cluttering process.

The same day we took the loads to goodwill, we stopped by Jysk because it was right by the donation center. 
Isn't there a saying - something about donating stuff and buying new stuff the same day? haha

We got lucky and there were having a bedding clearance. 
We were able to find some that was both gender neutral, but pretty and something both of us actually agree on. 


We previously purchased the bed mat at Walmart for $10. 
Deuvet Cover $12.99
Striped Throw Pillow $6.00
Total; $28.99

This price is great considering the one duevet cover we were looking at first was $40.00 on its own!

There is still much, much more to be accomplished in that room, but we've made tremendous progress the last couple of weeks and hope to continue to do so in the upcoming future. 
I will keep you updated with photos :D

Tuesday, January 1, 2013

Spare Room Revamp ~ December 2012 Progress

It may not look like progress, but trust me it is! 
We have sorted EVERYTHING! 
We have set up a filing system for all our papers. 
We have gone through and purged the insignificant items from our childhoods. 
When you are merging two people into one home, and into one life, there tends to be a lot compromising with each other. Especially when it came to our childhood things. 
We some how ended up with a whole laundry basket of stuffed animals. 
I don't think either of us realized how many stuffed animals we had bought for one another over the last 7 and a half years! 
 
Here are some photo updates you guys have been asking for! 


Look! An Empty Closet!!
 

Tips For Creating a Photo Wall

*Work In Progress ~ Check Back For Updates!*

In our home there is a semi-long hallway connecting the living area with the bedrooms and bathroom. 
This wall is very plain and was in desperate need of something to make it look more interesting. 
Ideally I would have loved to have painted this wall before creating the photo mural, but we aren't currently aloud to paint. 
 
 
Tip # 1 ; 
Pick A Focal Point 
I chose this large multi-photo frame that I purchased from Walmart for $10.00. It holds fifteen photos total and is a great starting point for this wall. 
I chose black because I wanted everything to pop on the light colour of the paint. 
In this frame I have photos of my childhood family vacations mixed with photos of my life now. 
It is kind of a look into the past and the present. It is cool to see how different my life is now and how much my family has grown. 
 
*Note ; the wooden 'believe' is not attached to the frame. It is separate. * 
 
Tip # 2 ; 
Don't Hang Things Right Away 
This is a big tip. Before commiting to a spot for a photo you want to hang, try it out. 
Bust out the scotch tape and put a little piece on the back and stick it where you think it will look good. 
This way you can try many different combinations before ultimately deciding on your favourite place to hang it up.

Tip # 3 ; 
Don't Put Anything Big On The Opposite Wall 
Because it is such a thin hallway, I don't recommend putting anything large or loud on the opposite wall. This will make your hallway seem smaller than it really is. 
I chose one of my favourite quotes, 'dance like no one is watching'. 
I actually found this sticker quote at my local dollar store for one $1.00 awhile back. 


As you can see, this wall is still a work in progress. 
There will be frequent updates over the next couple of months,
so stay tuned! 

Monday, December 10, 2012

Our Frugal Home ~ Bathroom Linen Closet

So, if you hadn't already noticed, I have been on kind of an organizational kick lately. And upon waking up today, I decided today was going to be the day that I finally tackled the linen closet in our bathroom. This closet has become a huge dumping ground. Out of sight out of mind right? Well not anymore! 

I had purchased the supplies to do this project months ago from Dollarama, I had just never got around to it. So keep in mind that the containers you see that I purchased for this project may not be available anymore, but I am sure they have something similar you can use. 

Before: 

See .. Dumping Ground!
Oh Boy!
 I knew that this was a project I had to commit to. No doing it half way. Once I started it I knew it had to be finished. It took me about 2 hours to fully complete this project, but I am VERY happy with the outcome. 

After: 

Much Better! 

 Top Shelf: 
Swim Towels & Guest Towels 

Second Shelf: 
From Left to Right : 
Makeup Caddy
Purple Basket: Headbands & Hair Clips 
Blue Basket: On The Go Products 
Green Basket (back): J's Stuff 
Green Basket Front: Medications 
Grey Basket: Teeth Products 
{ The Purple, Blue, & Green Baskets were $1.00 each at Dollarama }
{ The Long Grey Basket Came in A Set of 2 For $1.00 At Dollarama }
{ The Green Basket at the Front Came in A Set of 2 For $1.00 at Dollarama } 

Bottom Shelf: 
Left Basket: Hair Tools 
Right Basket: Products & Travel Make Up Bags 
{I had these baskets already from years ago, but they can be purchased at Canadian Tire for $10 each}


I am very happy with the results and I only spent $5.00 on all the baskets I needed at the dollar store!

Saturday, December 8, 2012

Dollar Store Finds December 08.12

I was doing some shopping in my local dollar store today and I thought I would share with you some of the great finds I came across!

Glass oil container for my counter. Love this! I have been wanting and oil 
jar but they are so expensive! This baby was only $2.00! What a steal!

Vase and branches for on top of dresser. This fits perfectly into the decor of
our master bedroom. The vase was $1.00 and the branches were $2.00. For a 
grand total of $3.00 I am loving this! 

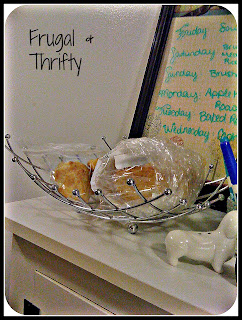
After reorganizing our kitchen counters I realized we no longer had 
a place to keep our bread products. I saw this at the dollar store 
and knew it would match perfectly. It was only $2.00. 

I found this Wilton brand cake cutter at my local dollar store and knew 
that it would be a savior when it came to cutting cakes! 
It has different knotches on the side to adjust the height of the cake 
and it slides perfectly across the cake with ease. I speak from experience! 
It was only $2.00! I saw something similar for $15.00 at Walmart!


Wednesday, December 5, 2012

About Our Frugal Home

We have lived in our current apartment for almost 16 months and as of right now we have no immediate plans to move. We have decided that the next time we move it will be to a townhouse or a house.

 We have a large two bedroom, one bath corner unit located on the first floor. Our unit is larger than other units with the same amenities because we are located on the corner of the building. Score. The building has 10 floors which house about 100 apartments in total. Our building is one of four that are grouped together in a square shape. In the middle of all the buildings there is a playground, basketball and tennis courts, and a pool. We also have access to a small gym and movie viewing room. We are fortunate that our unit faces the back of the building giving us a gorgeous view of the grounds. The buildings and surrounding area are well maintained.

While I was growing up I always lived outside of London (were we currently live). Then when I went away to university in Waterloo, I spent the first year living in the dorms, and the second year me and Josh shared an apartment in Kitchener. After having to drop out of school do to personal and financial reasons, we lived out the rest of our lease and decided that we would move back to the London area to be closer to both our families. When we were looking for an apartment in London, we didn't know exactly what we wanted. But it just so ended up that the place we live now gave us everything and so much more than we ever could have hoped for in a home. This was the only apartment we looked at in London. We immediately fell in love with the sense of community that you could feel in the buildings. We could not ask for a better living environment to be a part of.

When we first moved from Kitchener to London we didn't really have anything much to call our own. Our apartment in Kitchener was basically filled with furniture and items that were either mine growing up or were no longer wanted by other family members. The whole apartment was filled with mismatch furniture. We only had a mattress and box spring on the floor as a bed and a dresser that was borrowed from my sister (until she moved to a larger place) in our bedroom. We bought an old Kitchen table and chairs off my sister that was in rough condition. Our living room had a couch (borrowed from my sister) and a tv stand I had in my room as a teenager. Our tv is one I got on my 10th birthday and is so old that it has a built in VCR. Our spare room was used as additional storage for a large portion of the time spent there, until Josh came across an ad of Kijiji for a free futon. I didn't even hang up proper curtains. I just nailed sheets over the windows. Although the apartment wasn't close to anything I ever dreamed of, it was ours. It was a place that we could grow together and take on this new chapter in our lives together. Or so I thought. It didn't take long before living in Kitchener took a toll on our relationship. Josh didn't know any body in the city and took to acting like a hermit in the apartment. And I was working two jobs and some times 13 hour days to make ends meet and the last thing I wanted after a long day was to be social. We knew that it wasn't that we weren't suppose to be together, or that we couldn't make it work as a couple, it was that we couldn't do it in Kitchener.
Since moving to London our lives have been completely different. We see our family on a very regular basis and they are much more of a support group than they could have been to us in Kitchener. I can honestly say that neither of us was happy in Kitchener, but both of us are very happy in London.

When we moved to London we brought all of our mismatch furniture with us. It was only one load in my dads small work trailer and about 5 loads with 3 people to get everything into the apartment. All of our belongings could fit into the living room. It was kind of sad to realize that this is it. That was ll our lives consisted of.

Since living here, we have sold or given back to those we have borrowed from, our mismatch furniture and swapped it in for affordable items that way each room flow into the next.
We have a bed. Our own dresser. Our own couch. A dining set that isn't uneven or scratched. We have a very functional spare room with a large desk, play pen and single bed for guests. The only thing that was kept from our old place in my TV. We haven't really found the need to upgrade it yet since it works completely fine.

This apartment has become a home. Our home to be exact, and we are proud of it.


Our Frugal Kitchen Part Two

Hello Readers! Here is part two to my kitchen! Enjoy! 

Baking Supplies

Oils & Spices

Josh's Milkshakes above & Tea, Hot Chocolate & Box Soups Below

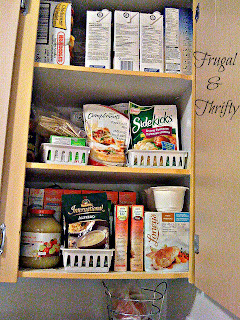
Top: Stock Overflow Items ~ Mr. Noodles, Broth, Oatmeal Packs, etc. 
Middle: Sidekicks, Pizza Crust Mixes, Crackers, Jello
Bottom: Sauce Mixes, Boxed Potatoes, Hamburger Helper, Apple Sauce

Baggies, Foil & Saran Wrap

Top: Snack Foods
Middle: Spices and Open Pastas
Bottom: Canned Goods, Treats, & Condiments 

Kitchen utensils

Sponges & Scrubbers

Silverware Drawer
Kitchen Towels

Pantry Stock Items


Our Frugal Kitchen Part One


I was recently emailed and asked for photos of our home. And since I like to give the readers what they want, here it is. I'm starting with the kitchen because it is probably the room I spend the most time in. So, here it is in all its glory!


Pantry Cupboard with Meal Plan Wipe Board and Baking Canisters 

Right Side of Kitchen

Canisters with Dry Goods & Knife Block
Microwave
Top of Microwave

Stove
Common Used Utensils, Milkshake Maker, & Toaster
Fridge
Dishes
Left Side:
Top; Fancy Coffee Cups, Kids Plastic Cups 
Middle; Large and Small Dinner Plates 
Bottom; Drinking Glasses, Commonly Used Mugs 
Right Side:
Top; Flower Coffee Mugs(behind) & Mixing Bowls(front)
Middle; Serving Bowls & Josh's Medication 
Bottom; Cereal and Soup Bowls & Measuring Cups


CLICK HERE TO VISIT PART TWO OF OUR FRUGAL KITCHEN!

Tuesday, December 4, 2012

$20 Baking Canister Revamp


I don't know about your pantry cupboards, but I am frequently finding that my baking supplies tend to take over the whole place. I would go into the cupboard looking for something specific for a recipe and end up thinking we had ran out of it and double buying it, simply because I did not have a good organizational system. I had a set of four canisters that I kept on the counter already that held flour, white sugar, brown sugar, and baking soda, but I wanted a different look. I wanted to be able to display all of my commonly used baking supplies so they would be at my finger tips when ever I needed them.

 I decided that as a Christmas present to myself, I was going to revamp my baking supplies by adding some canisters! 

The first part of this project required me to find good quality, affordable canisters. I have seen ones I like in big name designer stores where each canister can cost up to $15.00. This would be completely unacceptable considering how many I planned on purchasing. 

After a couple trips to various discount stores and dollar stores I found ones that were extremely affordable and would match the decor of my kitchen since I decided to display them. I found glass canisters with stainless steel lids in various sizes that would work perfectly for this project. I purchased 6 large canisters and 2 small canisters to start. 

Each large canister retailed for $2.00 each and each small canister retail for $1.50 each. This put me at a total of about $15.00. 

What Did I Put In My Canisters? 
  • White Sugar 
  • Brown Sugar 
  • Cocoa Powder
  • Icing Sugar 
  • Oatmeal 
  • Flour 
  • Baking Soda 
  • Baking Powder 
After a long process of removing the packaging, washing, drying and placing everything in the canisters, I placed them on top of my pantry cupboard. I wasn't completely satisfied.
Something is missing here ... 


I decided that I wanted to purchase labels for these babies, but I didn't want them to be permanent. After searching out some of my options I found that the Martha Stewart line at Staples carried labels that were chalkboard stickers. I was immediately intrigued. I went to Staples the next day and purchased those labels right away. They retailed for $6.00 for a 12 pack (only $0.50 each), but I only used 8 leaving me with 4 for another project! The best part of the labels is that I can wipe the chalk off and rewrite on the label if I happen to change what is in the canister. Very thrifty if you ask me!


 Here is the final product: 

Much better!


 I am extremely happy with the final outcome.
Money Spent:
Large Canisters $2.00 x 6 = $12.00
Small Canisters $1.50 x 2 = $3.00 
Labels $0.50 each x 8 = $4.00 
Giving us a grand total of $19.00! 

~*~

The Question You May Be Asking Yourself Now, What Did She Do With the Old Canisters?


I reused them of course!


Large Canister; Spaghetti 
Medium Canister; Penne Pasta 
Medium-Small Canisters; White Rice 
Small Canister; Bread Crumbs