Showing posts with label Do It Yourself. Show all posts

Wednesday, March 5, 2014

Bread Maker Pizza Dough


This is seriously the best pizza dough recipe ever. 
Once we tried this one we haven't turned back. 
It is so simple, and so delicious. 
Even my 6 year old nephew complimented in when he was over once! 
Place all the ingredients in the drum of your bread maker recipe in the order shown; 
yield; 1 large or two medium pizzas
(I usually do one medium pizza and have enough dough left over for bread sticks!)
1 cup of water 
1 tbl butter or margarine 
1 tbl sugar 
1 tsp salt 
3 cups of white flour 
1 1/4 tsp of yeast 

Load the drum into the bread maker and select the dough/pasta setting and let it run. Mine takes 2 hours. 
When dough is finished, place on lightly floured surface and knead a few times. 
Roll out dough to desired shape and thickness.
I have made traditional round pizzas and also done large square pizzas. 
Top your pizzas with your desired toppings and place in a preheated, 425 degree oven. 
Bake for about 15 - 25 minutes depending on the shape and size of your pizzas. 

Sunday, February 23, 2014

Scented Salts


Here's a very simple DIY for scented salt bags for your dresser drawers!

All You Need; 
Epsom Salts 
Essential Oil Scent of Your Choosing
Little See Through Bags 


Use 1/4 of salts per little bag you make.
Whisk with a few drops of essential oil until it is as strong as you would prefer. 
 
Place in little bags and pop in your drawer! 
Smells great every time you open it up!


Thursday, June 20, 2013

DIY Mason Jar Soap Jar


I was seriously sick of seeing the plastic bottle of dish soap on my counter and really wanted something a little prettier. I also woke up in craft mode today apparently. 

What You Need ; 
- Mason Jar with Lid 
- Soap Pump from old hand soap container 
- Hot Glue Gun 
- Hammer & Nail

 
What To Do ; 
- Poke a small hole in the middle of the lid with the hammer and nail 
- Slowly make it large enough to fit the pump in
*don't make it too large. you want the pump to fit tightly *
- Apply a large amount of hot glue around the inside of the lid around the pump. 
- Let dry completely.
* tube might be too long to fit into jar so trim it. I recommend trimming on an angle* 
- Fill jar with soap and you're ready to go.

finished and pretty!


Saturday, February 23, 2013

Febreeze


This recipe is simple and frugal.
It uses items that you probably already have in your house and it works wonderfully. 
Save some money and make your own febreeze! 
You will be amazed how great it works! 

{ All You Need }
1 Part Fabric Softener (I recommend using your favorite scent!)
5 Parts Water 
2 Teaspoons of Baking Soda 

Mix the above ingredients together and put in an empty spray bottle. 
Shake well before spraying! 


 This spray covers regular household odors and works great on children, pets, and cooking smells! 
Get spraying lovelies!

They may be small but they smell pretty bad sometimes!

Saturday, February 16, 2013

DIY ~ Powder Laundry Detergent

The cost of laundry detergent these days is getting ridiculous. 
You can cut costs by making your own. 
This makes a very large batch, so before starting make sure you have a container big enough to store in. 
I only make half a batch at a time because I don't have a container big enough. 

~ note; prices next to items are approximate and for my area (Canada) ~

What You Need; 
  • 1 Box of Borax (4 lb) $6.00
  • 1 Box Arm and Hammer Washing Soda (Make sure it is washing soda-not baking soda) (3 lb) $5.00
  • 2 Boxes of Baking Soda (Small - regular size ones) $1.98
  • 1 Container of Oxy Clean (3lb) (I used the store brand of this) $5.00
  • 2 Bars of Laundry Soap (I used Linda brand) (Found in laundry aisle) $4.00
  • Bottle of Purex Crystals (Optional but smells yummy!) $5.00
>>>>>>>>>>>>>>>>>>>>>>>>>>>>>>>>>>>>>>>>>>>>>>>>>>>>>>>>>>>>
 
First, in a large bucket carefully stir together borax, washing soda, baking soda, and oxy clean. I recommend only doing parts of each product at a time to ensure everything is mixed together well. 
Then add grated laundry soap bars and purex crystals(if wanted). Mix extremely well. It's hard on the arms! 
 Store in large airtight container
I also store the laundry powder in the empty purex crystal container for easy use in the laundry room. 
Use 1 - 2 tablespoons per load. That's it. 
    You barely need any of this mixture to get you clothes clean. 
And believe me, it will get them clean! 
This stuff is like magic! 
I have notced since using it that my white are much whiter than with store bought liquid detergent and bleach. 

~ * remember this is a no suds detergent. So when you don't see any bubbles forming, don't worry. It is still doing its job! * ~

Wednesday, January 30, 2013

Ant Killer Spray


Lately, I have noticed a big ant problem around our dog dishes lately. I have tried every home remedy I could think of to get rid of them. I refused to buy any ant poison because I don't want to spray that stuff when we have pets. 
I finally came up with a combination of three ingredients that I already had, and I bet you have too. They are common household items and when combined together they create a great ant spray that works wonders! 

INGREDIENTS ; 
- Hydrogen Peroxide 
- Mouth Wash 
- Dawn Dish Soap 

I mixed a tablespoon on each in a spray bottle and swirled it. Don't add any water. 
Generously spray the area and leave fore 10 - 15 minutes. 
Wipe the spray and ants up after letting it sit. 
I recommend washing your floor afterwards.

Ew.
This stuff worked so great! I am very pleased to say that since doing this 3 days ago we haven't had any more ants! Hip hip horray!

Friday, January 25, 2013

Make Your Own All Purpose Cleaner

All You Need ; 
- Mason Jar 
- Orange Peels (2 oranges worth) 
- Vinegar (enough to fill jar)
- Spray Bottle 


What To Do ; 
- Place two oranges worth of peels into your mason jar 
- Pour enough vinegar into the jar to cover everything
- Make sure the peels are completely covered 
- screw on lid and leave at room temperature for two weeks 
- After two weeks, place a large bowl with a strainer over top
- Pour contents of jar into strainer to get rid of peels 
- Fill spray bottle with half orange mixture and half water 
- Use in place of your regular all purpose cleaner 
:)

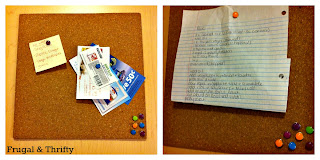
Cork Board Lined Kitchen Cabinets

I've seen all over Pinterest lately how different people were putting cork board up in their kitchen cabinets. 
I thought this was such a great idea! 
You can put recipes, shopping lists, receipts, coupons, and basically anything on those boards and its conveniently in your cupboard and not scattered on your counters. 
I immediately wanted to do this project, but knew I didn't want to pay an arm and a leg. 
So I headed to my local dollar store to see what supplies I was able to purchase there before I looked anywhere else. 

Supplies ; 
Cork Boards (I found a 2 pack at the dollar store for $2.00) 
Mounting Tape (dollar store $1.00) (still lots left!)

I measure my cabinets before hand to make sure there wasn't going to be any cutting needed or that the cork boards would interfere with closing the doors.
I was lucky that no cutting was necessary! 

I placed 5 pieces of mounting tape on the back of the cork board.
In the four corners and one in the middle. 
I stuck them to the door and pressed hard to get them to stick. 
I recommend leaving them for at least 30 minutes so they have time to really stick to the door. 

All Finished! 
So Practical!

Thursday, January 17, 2013

Cleaning Your Makeup Brushes

I hadn't realized how long it has been since the last time I washed my brushes, so I thought I would share how I do it with you. 
Think about how much build up occurs on your brushes after continual use. 
The last photo will prove how gross it really becomes.

 Things You Need;
- Vinegar 
- Hot Water 
- Cold Water 
- Your Brushes 
- Towel for Drying 

1 cup of hot water to 1 tablespoon of vinegar 

Let your brushes soak for 10 - 20 minutes (maximum!) 

Take brushes from vinegar water and swirl in cup of hot water then cup of cold water. 
Pat dry on clean towel. 
Finished water. 
Ew. 
That is all I can say. 
Ew.
 

Thursday, January 10, 2013

Air Deodorizer ~ Make it Yourself


What You Need; 
- Baking Soda 
- Old Jar 
- Essential Oils 
- Hammer And Nail 

~ Wash out jar and dry completely. I pulled the label off and added some decorative paper. I then nailed some holes in the lid of the jar. I put in 3/4 of a cup of baking soda and 10 to 15 drops of essential oil. I stirred it up and put the lid on. ~ 

~ Shake the jar every couple of days and add oil as needed ~ 


Wednesday, January 9, 2013

Make Your Own Cooking Spray

I don't know about you, but I feel like I go through a lot of cooking spray! 
Probably a bottle per month. 
That adds up a lot! 
Even if I purchase the store brand its still $3.00. 
3.00 x 12 months = $36.00 a year (approximate). 
That is just ridiculous. 
I decided to make my own cooking spray to save money, and cut down on waste. 

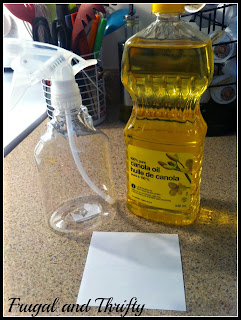
Oil of Your Choice 
Misting Spray Bottle (I got mine from the dollar store for $1.00) 
Label & Tape 

I wrote on the label and stuck it to the bottle. I then covered it with clear scotch tape so it would not rub off if something spilt on it. 

Recipe for Spray ; 
1 part oil of your choice (I used canola) 
5 parts water 
~ Put in bottle and shake well ~ 
~ Shake Before Use ~

Save money. 
Reduce waste. 
Know what's in your cooking spray exactly! 

Monday, January 7, 2013

Reusable Dryer Sheets

Looking for a more frugal, eco-friendly alternative to store bought dryer sheets? 
These make it yourself sheets are cheap, easy to do and actually work. 

Here's what you need: 
~ Old Shirt or Towel
~ Fabric Softener 
~ Bucket or Basket for Storage 

Steps: 
First, take your old shirt or towel and cut it into pieces. Make sure these pieces are not too small. 
Next, put all your sheets into a large bowl and cover with a combination of 2 parts fabric softener to 1 part water making sure everything is covered. 
Leave in bowl over night.
Squeeze out sheets individually and lay out in a single layer to dry. 
Once completely dry, store in a container. 
Throw a few of these sheets into the dryer with your wet clothes. 
Pull them out of your laundry when its finished and put them back in the basket. 
These sheets can be used a bunch of times before you have to re-soak them. 

Frugal and Reusable! 
My kind of project!

Sunday, January 6, 2013

DIY ~ 12 Section Scarf Holder

My scarves seem to be taking over my life lately! 
I decided that it was finally time to organize them properly. 
When I was looking into buying a hanger specifically designed for scarves, they were anywhere from $10 to $25 dollars! Ridiculous prices if you ask me. 
I decided I would make a special hanger myself, and was please to discovered that the final cost was under $2.00. 
 
Hanger ~ on hand ( I recommend using a thicker, more heavy duty hanger or it will begin to drop with the weight of the fabric. 
Shower Curtain Rings ~ $1.25 for 12 at my local Dollarama 
Ribbon ~ $1.00 (did not use it all) 

Firstly, I suggest you clip all the rings closed. 
Next, line your rings in a single line beneath the bottom on your hanger. 
Then tie strands of ribbon from the ring onto the hanger. 
Do this for every ring. 
Once you have your first layer attached to the hanger, then tie ribbons from ring to ring to connect them and make it so they don't slip. 
Next add another layer of rings, tying ribbon to the other rings to hold them in place. 
Do this until you have used all 12 shower curtain rings. (yes, I am aware only 9 are pictured. The other three were added after) 
I don't recommend having more then 12 rings on one hanger because the weight of the scarves can cause the hanger the droop and it could break if there was too much weight. 

Finished Hanger. 

It holds all my scarves and there are still some empty spaces. I guess this means I need to go scarf shopping!


Make Up Brush Holder

If you're anything like me, your make-up is in every room of the house scattered everywhere. 
I wanted to make a place specific for my make up brushes that would look nice enough 
that it would be able to sit on the bathroom counter. 
I think I found a happy medium with this organizer. 

I choose blue decorative sand so it would match the decor of our bathroom. 
I already had the candle holder on hand, but I saw similar ones at my local dollar store for $2.00. I also purchased the decorative sand for $1.25. I only used about a third of it, leaving leftovers for other projects.

Simply wash out your candle holder if it has been used and dry it completely. 
Pour your sand or vase filler into your holder, adding as much or as little as you want. 
You basically want enough to hold the weight of your brushes. 

The Finished Product.
I love the way this looks on our counter. Its simple, and cute. You can use your brushed then put them right back with no worries. 
This holder turned out so well that I am thinking of making a similar one for all my lip glosses! 
Photos to come when they are made!

Wednesday, January 2, 2013

Steam Clean Your Microwave

I seriously hate cleaning my microwave. 
It is the one thing in my kitchen that gets neglected on a regular basis, so when I saw a post on Pinterest for how to steam clean your microwave, I decided to try it out. 

All you need is equal parts vinegar and hot water. 
Place in a bowl together and pop it in the microwave for 10 minutes. 
I used 3/4 of a cup of each. 
Once it is done in the microwave, remove the bowl (be extremely careful! the bowl will be very hot) and gently wipe all sides with a rag. 
Voila! Sparkling clean and so simple! 

It's Magic!