Showing posts with label yum. Show all posts

Tuesday, March 25, 2014

Wonton Soup


We had a hankering for chinese food this week but, did not want to spend a fortune on take out. It's nearing the end of the month, and very close to the end of our food budget. 
So, I figured I could make sweet and sour chicken, vegetable fried rice and wonton soup for a fraction of the price of delivery. 
~recipe for sweet and sour chicken & vegetable fried rice here~

Ingredients; 
Wontons
Ground Pork 
White Onion 
Portabello Mushrooms 
Carrots
Chicken Broth 
Soya Sauce 
Green Onions 

Steps;
First, get the filling ready for your wontons. In a food processor place your ground pork (I used about half a pound), half of a medium sized white onion cut into chunks, and salt and pepper to taste. Pulse mixture until it becomes a smooth paste. 

 
Take your wontons (I used small wontons for this) place a small amount of mix in the middle and wrap tightly. Use water as a paste on the sides of the wonton. Place to the side. 
*I made half of a package, about 25 filled wontons*
  

Next, in a large pot bring 2 cups of chicken broth, 3 cups of water, and 1 cup of soy sauce to a gentle boil. 
While waiting chop your vegetables. Slice carrots thinly, as well as mushrooms and shallots. 
Once broth is boiling add all vegetables and continue on a gentle boil for 5 minutes. Add wontons. Continue to boil for another 5 minutes stirring occasionally. 
Turn heat down to medium-low and cover. Let stand for 20 minutes before serving. 

Delicious!!

Monday, March 24, 2014

Thursday, February 27, 2014

Banana Oat Muffins


These muffins are great for busy mornings!
They are the perfect grab-and-go breakfast item!

 
Ingredients;
1 1/2 cups of flour
1 cup of oats
1/2 cup of sugar
2 teaspoons of baking powder
1 tsp of baking soda
1/2 teaspoon of salt
1 egg
3/4 cup of milk
1/4 cup of vegetable oil
1 teaspoon of vanilla extract 
1 cup of mashed banana


Steps for Success;
Combine dry ingredients in a large bowl ; flour, oats, sugar, powder, soda, and salt.
In a seperate bowl, beat egg lightly.
Stir in milk, oil, and vanilla extract.
Add mashed bananas and combine well.
Fold dry mixture into wet mixture completely.
Make sure to scrap the sides of the bowl while combining.
Pour evenly into lined cupcake tray.
Bake in preheated 400 degree oven for 18-20 minutes.
Makes 1 dozen.


Friday, February 21, 2014

Parmesan Asparagus


This is one of or all time favorite side dishes! 
We make it so often its ridiculous!


All You Need;
Asparagus 
Olive Oil 
Salt & Pepper
Parmesan Cheese 


Place asparagus (fresh or frozen) in a sauce pan with 2tbl olive oil and 1tbl of water. 
Saute on medium heat until soft. 


Push asparagus to one side of the pan and sprinkle a generous tablespoon of parmesan cheese on top. 
Stir to combine. 
Serve with favorite meal! 


Wednesday, February 19, 2014

Homemade Cheesy Scallop Potatoes


I love me some scallop potatoes. 
I'm usually a cheater and will buy the boxed kind, or if I am feeling extra cheater-y I will buy the frozen kind.
I know, I know. 
But, I wanted to try to make my own scallop potatoes. 
I've wanted to do it for awhile now and I finally decided to do it the other day. 
I also discovered something. 
All the ingredients to make the potatoes were cheaper than the boxed ones, and a lot cheaper than the frozen kind. 

I estimate for this recipe its about $3-$4 depending on where you purchase your ingredients.

Ingredients;
3 - 4 Russet Potatoes (washed and sliced very thin)
2 tbl of butter 
2 tbl of flour
1 1/2 cups of milk
1 1/2 cups of grated cheddar cheese 
salt and pepper to taste

Cheese Sauce
In a small sauce pan, melt butter and mix in flour. 
Stir until completely incorporated. 
Add milk and whisk. 
Add salt and pepper to taste. 
Bring to a boil stirring occasionally. 
Stir in cheese until melted and smooth. 


In the bottom of a casserole dish, make a layer of potatoes that completely covers the bottom. 
Add half the cheese to cover the potatoes. 
Add another layer of potatoes to cover the cheese sauce. 
Add remaining of cheese sauce. 
Bake at 350 degrees for 1 hour until golden brown and bubbly. 

Finished Product. Yum-o.

Saturday, February 15, 2014

Tomato Macaroni Soup


This recipe is one of my all time favorites. 
Mostly because of how versatile it really is. 
The tomato base of this soup is easy, inexpensive, and healthier than using a cream base. 


What you Need For The Base; 
- Can of Original Tomato Sauce 
- Carton of Broth (Chicken or Vegetable)
- Can of Crushed Tomatoes 
- Salt & Pepper to Taste
 
 
To make the base all you have to do is empty the pasta sauce into a large soup pot and slowly add the broth. Whisk until combined. 
 
Add Ins; 
- Elbow Pasta 
- Carrots 
- Celery 
- Zucchini 
- Potatoes 
- Spinach 
- Anything you have! 
 
If choosing to add pasta or vegetables, I recommend bringing the base mixture to a steady boil before adding your yummy extras. 

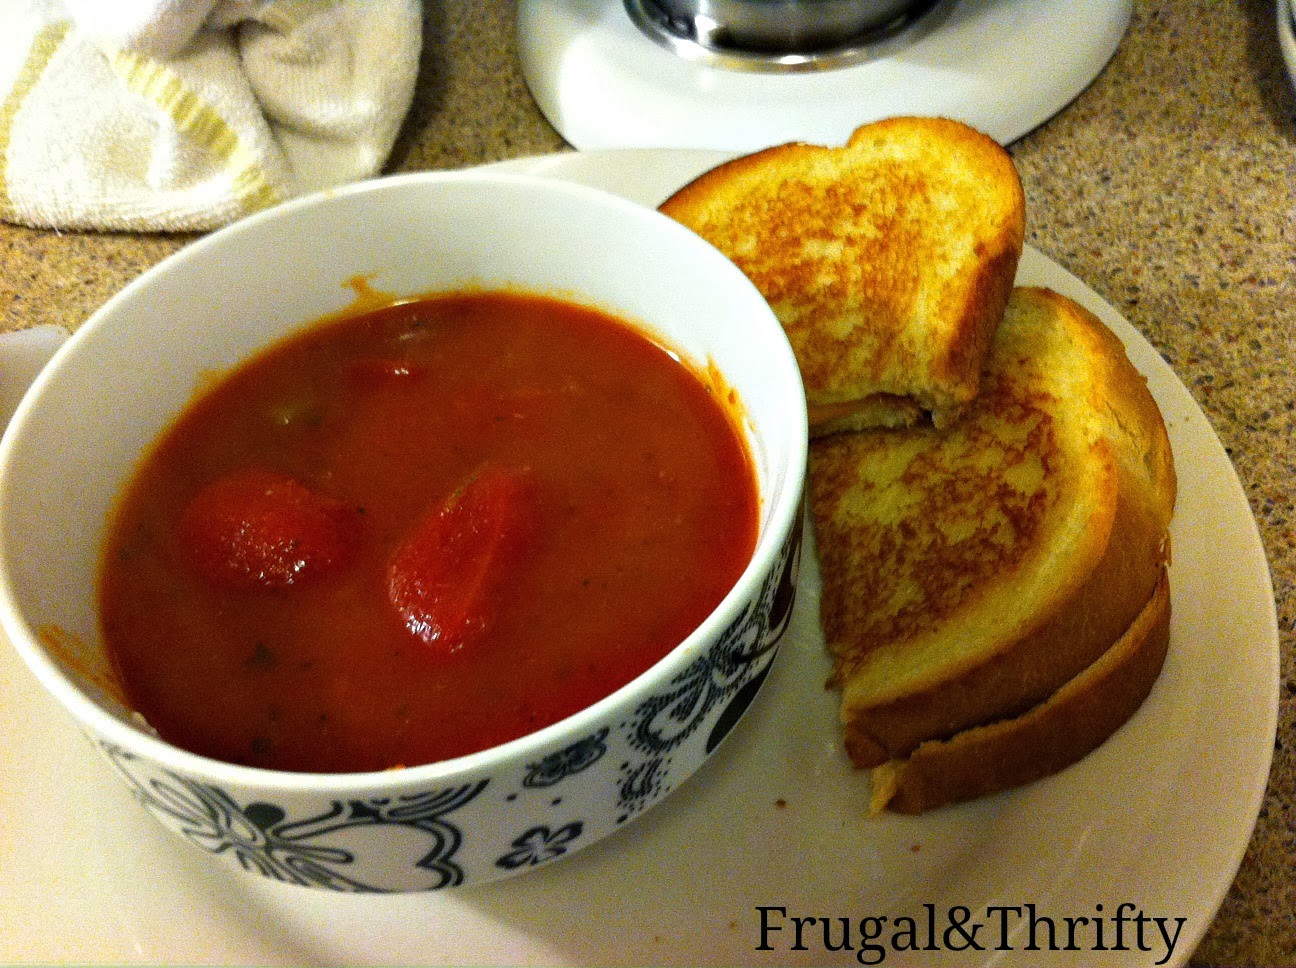
The finished product. 
I went with a very simple soup of the tomato base, elbow pasta and canned tomatoes.
Served with warm grilled cheese for dipping. 
Delicious. Easy. Quick. Frugal. 


Thursday, February 13, 2014

Cupcakes for Your Valentine


Sweet tooth!

Today I made cupcakes for my sisters kindergarten class. 
They turned out so cute I just couldn't not share them with all of you! 

I used boxed cake mix (sue me), and premade icing that I coloured with food colouring. 


I baked the cupcakes in plain white liners, then when I placed them in the clear cup I put a decorated liner on the bottom of the cup.
I iced the tops with a pretty pink icing and stuck a cute little glittered heart in each one. 
 

I wrapped each cupcakes cup in a clear plastic treat bag and tied with a pretty ribbon. 
I added tags saying who they were from and curled the ribbons. 


Adorable!! 
 
Enjoy your Valentines Day everyone!


Monday, February 10, 2014

Febraury Meal Plan ~ Week 2


Here's the menu plan for week 2!
There's some overlap from last week with the homemade pizza, but its one of our all time favorite meals and there are endless possibilities on how to make it! 

Monday - Tomato Macaroni Soup & Grilled Cheese - Recipe to be posted

Tuesday - No recipe 

Wednesday - Nachos with Spicy Chicken
using homemade taco seasoning; 

Thursday - Pulled Pork Sandwiches & Fries & Salad - Recipe to be Posted 

Friday - Ham, Scallops, & Vegetable 

Saturday - Homemade Pizza & Garlic Bread

Sunday - Leftovers


Sunday, February 9, 2014

My Birthday Cake 2014


Every year (mostly), I make my own birthday cake. 
I really don't mind doing it because I loooove to bake. 
It all started a few weeks ago. 
My sister mentioned to my three year old nephew that my birthday was coming up. 
He told her that he wanted to back me a chocolate strawberry cake because it was his favorite. 
He is just the cutest little guy. 
I decided to invite him over to help me make the cake the day before my birthday. 
It was adorable, and he actually helped a lot more then I thought he would!
This year I am doing something a little different in terms of ingredients. 
I didn't have the time to bake a whole cake from scratch with everything else we have going on right now, especially with an impatient little helper.
So I decided to purchase a box cake and premade icing. 
I know, I know. 
But I wasn't going to just make a cake and slop some icing on it. 
I'm going to revamp the boxed cake!
What you need; 
~ Chocolate Cake Mix (I opted for gluten free as some family members attending are not eating gluten)
~ White Icing 
~ 1 packages of strawberries
~ 3 Eggs & 1 cup of water (for cake)
 
Simple right?  

Step#1; Mix chocolate cake mix according to directions on the box and bake for appropriate amount of time. I baked my cake in two round pans for easy stacking. After they have finished backing, set to the side to let cool completely. 
Step#2; While cake is baking wash and haul all strawberries. I sliced mine and tried to get them to all be the same thickness (tried being the key word here!). Set aside in fridge.
Step#3; Scrap icing into kitchen aid mixer bowl completely. Using the whisk attachment whip the icing until it doubles in size. Cover with saran and place in fridge. 
Step#4; Once cake is completely cooled, pick the cake you would like for the bottom layer and place on a flat sturdy surface to hold cake. Gently cut top of cake to make it as completely flat as possible. Dont worry if its not perfect, mine wasn't! 
Step#5; Then generously add vanilla icing and carefully spread evenly on cake. Next add a fully layer of your sliced strawberries. 
Step#6; After that I sliced the next cake as evenly as I could and carefully placed on top of the other cake.  
Step#7; Repeat step #5 using the remaining icing and strawberries. I added an extra glob of icing to the top of out cake just for fun!